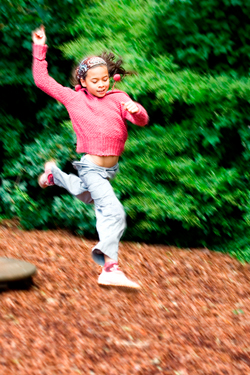
Ever go to a playground and watch the kids play? Most of the children move around with ease… in every possible position… often at top speed.

Remember when movement was easy... and even fun?
Compare that with the posture and movement of the average back pain sufferer… or even just the average 40 year old.
Normal movement is confined to positions maintained day after day. Any variation in normal routine becomes immediately noticeable as stiff muscles resist unfamiliar movements and joints creak and ache.
Suffice it to say our bodies don’t want to move the way they used to. It’s almost like being caught in Superman’s web… keeping our movement painfully restricted.
That’s because in a sense we are stuck in a web. It’s a super-strong yet elastic web of connective tissue in our bodies called the fascia.
Your fascia covers and connects everything inside you. Muscles, bones, blood vessels, and skin is all connected from the crown of your uninterrupted to the to the tip of your toes thanks to your fascia.
In good condition, fascia acts like a shock absorber and permits your body to move freely without parts of your body becoming disconnected from each other.
But after years of minor and major injuries, stress, poor posture, and inflammation, your fascia loses much of its elasticity. Muscles adhesions, or internal scarring, lock up your muscles and tendons in continued spasm. That’s why you feel soreness from simple stretches.
Try this. Stand up and raise your hands straight up and stretch your arms as far as you can skyward while your feet remain planted on the floor. Do you feel resistance?
How about when you look as far as you can to the left, to the right, and then tilt your head back until you’re looking straight up? That tightness is from internal scar tissue binding your fascia and muscles. It might even be painful just to move your body in what should be normal easy movements.
But the good news is you don’t have to stay stuck in pain like this…
Rolfing Bodywork
When the fascia is released from its stress and containment, your body has room to stretch out. And once again move pain free.
Just like you can get your car a tune up when it starts running rough, you can also give your body a “tune up” to get back the mobility you once had. Free up your fascia from its stress and containment and suddenly your body has room to move… without the pain.
This tune up is called Rolfing.
Rolfing is similar to deep tissue massage as it is a hands-on technique that uses direct deep pressure to release muscle adhesions and break apart the scar tissue binding your fascia.
Unlike most forms of massage which typically focuses on muscle relaxation, Rolfing is more concerned with correcting structural issues in the fascia and soft tissues of your body caused by these adhesions. In just ten sessions, Rolfing can take years off the way your body moves and feels.
The Rolfing Ten-Series
The Rolf Institute recommends going through these ten basic sessions to balance and restructure your body for the best possible results.
Rolfing motions are similar to deep-tissue massage, where the practitioner uses their knuckles, flat palms, or elbows to get the job done. Each session includes some form of neck and back work near the end. This allows the body to balance itself, while integrating the changes made to its alignment in the soft tissue.
Each session works to achieve a certain goal in a specific area of the body.
Sessions 1-3 — The “Sleeve” Sessions
The first few Rolfing sessions focus on loosening and balancing the superficial, or surface, connective tissues of your body.
Session 1 enables better breathing by ‘unsticking’ your chest and pelvis
Works: shoulders, chest, ribcage, sternum, legs, hamstrings, and superficial fascia.
This session works in two ways to help you breathe better. First, it opens up the diaphragm by releasing the ribcage and shoulders. Second, it releases your torso from the pelvis and lengthens it in the opposite direction than we’re used to–hunched over at a computer or desk. When your chest and pelvis are crunched up into your ribs, it forces you to breathe shallowly. Full breathing is a core element to wellness. Upper body pain is often relieved in this relaxing first session.
Session 2 aligns your relationship to the ground
Works: knees, lower legs, ankles, and feet.
Your feet and lower legs provide the foundation for your support and balance. They are the base for the rest of your structural alignment. This session works towards equal weight distribution across both feet, corrects fallen or high arches, knee pain and scar tissue. This relieves pain and improves balance in your lower extremities.
Session 3 creates a lateral line
Works: neck, shoulders, arms, abdomen, thighs, hips, pelvis, and knees.
This session takes an inventory of your posture from a side angle. It works on balance and allows the heavier sections of your body to support each other better.
Sessions 4-7 — The “Core” Sessions
The “core” structures are between the bottom of the pelvis and the crown of the head. These sessions work on deeper tissues and focus on balancing your legs, abdominal muscles, pelvis, and neck as supporting structures.
Session 4 aligns the middle section of the body
Works: ankles, knees, thighs, hips, pelvic floor muscles.
The relationships between your feet and pelvis, knee and hip, and legs and pelvis are examined and re-aligned. This session releases your pelvis for a wider range of motion, while engaging the pelvic floor muscle for core support. This session also addresses torsions (twists) in your knees and hips.
In this session, a mild emotional reaction may occur due to the release of the physiological and psychological tension held in the pelvis.
Session 5 balances abdominal muscles to the curve of the back
Works: legs, hip flexors, abdomen, diaphragm, ribcage, and sternum.
This session works on the frontal vertical line of your body. By releasing the hip flexors, your pelvis is allowed to return to a more natural position. The front of your body will seem to lengthen and tension in your lower back will dissipate. Now that the abdomen is no longer crunched in a confined space, your inner organs have more room to do their duties as well.
This session will also balance your abdominal muscles to the curve of the spine. It activates your abdominal muscles for core strength and support.
Session 6 creates vertical symmetry
Works: posterior ankle, calves, thighs, hamstrings, gluteal muscles, deep rotator muscles, the sacrum, lower and upper spine.
This session is the mirror image of session 5. It works the back vertical line of your body to create symmetry to the front. It releases the backs of your legs and spine from the pelvis. This is going to be the back-pain release for those suffering from scoliosis and sciatica. More support and movement in the legs, pelvis, and lower back is the goal in this session.
Session 7 balances the neck and head
Works: cranium, neck, jaw, shoulders, chest, and arms.
The previous six sessions created a strong structure. The seventh session balances your neck and head at the top of your spine and re-aligns your jaw. This will release tension in your face, neck, throat, and head.
Sessions 8-10 — The “Integration” Sessions
The final three sessions integrate the core and structural work of the first seven sessions to help your body achieve complete physical balance.
Sessions 8 and 9 integrates the upper body to the lower
Works: pelvis, upper or lower body.
These sessions vary depending on your body’s specific balancing needs, but the goal is to integrate the function of your upper and lower body together with your pelvis as the center point. During these two sessions, the Rolfing practitioner will ensure your legs, arms, shoulders, neck head, and other structures function well together.
Session 10 concludes the series with final integration
Works: ankles, knees, hips, diaphragm, neck, and cranium.
The last session concludes the ten series with final integration of your upper and lower body, basically covering anything the last nine sessions didn’t. This session is usually customized to cover your entire body at a superficial level to clear up any remaining issues.
By the end of the Rolfing Ten-Series you will not only move more freely and with less pain, you will also experience a whole new level of wellness thanks to the release of constrictions around your body’s critical organs.
And one last bit of good news: many people start feeling better immediately after the very first session. After a complete Rolfing body tune-up, you’re sure to feel better than you have in years.
Most Popular:
Little-known Enzymes Naturally Break Down Internal Scar Tissue
References
Viera L. Rolfing revealed. Chicago Tribune: Health. 2010 Feb 21:18-9.
The Rolfing Ten-Series. Rolf Institute of Structural Integration.
Ward, B. The Ten Series. ActionPotential. 2002.
Evanko, S. The Ten-Series. Performance Rolfing.


Stretching to increase or maintain flexibility is one of the most important things to do as we get older.
Appreciate the article.
Isn’t Rolfing painful?